Forum Replies Created
-
AuthorPosts
-
July 20, 2026 at 10:11 am in reply to: How to create multiple options for one product woocommerce #5072
 ZainParticipant
To create one WooCommerce product with multiple selectable options using WP Swings:
1. Create a variable product
Edit your product and set Product data → “Variable product”.
Add attributes (color, size, brand, etc.), mark them “Used for variations”, and generate variations so each combination (e.g. Red / Medium) has its own price, stock, and image.2. Add Colors and Swatches
Install WP Swings “WooCommerce Colors and Swatches for Variations”.
Configure global attributes and choose how each term displays (color block, image, or text) so customers click swatches instead of dropdowns on product and shop pages.
Optionally use Advanced Product Variation3. Install WP Swings “Advanced Product Variation for WooCommerce”.
Enable variation galleries/tables and variation‑wise image/video so all options for that product are visible and comparable on a single, rich product layout.
On the front end, shoppers see one product page where they select color/size/brand via swatches, and can view all variations (with images, prices, and stock) in galleries or tables, instead of browsing separate products.
ZainParticipantDeciding between WordPress.com and WordPress.org (self-hosted) is the most critical technical decision you will make for your site’s SEO strategy.
While both platforms share the same core code, the way they handle SEO – and the freedom they give you to optimize – is vastly different.
As of 2026, the gap between the two has narrowed for high-paying users, but the “total control” of a self-hosted site remains the gold standard for competitive rankings.
Many users migrate from .com to .org specifically to improve search rankings.
Here is why it usually works:
- Custom Permalinks: You can create cleaner, more keyword-rich URL structures that .com sometimes restricts on lower plans.
- Advanced Schema: Self-hosted sites allow for sophisticated Schema.org integration, helping you win Rich Snippets (stars, prices, and FAQs) in search results.
- Core Web Vitals: You can use advanced optimization plugins (like WP Rocket or FlyingPress) to achieve “Perfect 100” scores on Google PageSpeed Insights, which is harder to do on the restricted .com architecture.
Important Note: If you migrate, you must use a proper 301 redirect strategy to ensure you don’t lose the “link juice” and authority your old site built up.
The Verdict for 2026
- Choose WordPress.com if you have a high budget, want a “hands-off” technical experience, and are willing to pay for the Creator plan to get SEO plugin access.
- Choose WordPress.org if you want the highest possible SEO ceiling, full ownership of your data, and the ability to pivot your strategy as search engines evolve.
Summary for your strategy: If you have the budget ($300+/year) and want a hands-off technical experience, the WordPress.com Creator plan is now viable for SEO. If you want maximum performance for a lower cost and full technical control, WordPress.org remains the superior choice.
ZainParticipantA splash screen is a quick screen that shows before the main website (like “Enter site” or age verification). It doesn’t really sell anything, it just blocks or delays entry.
A landing page is where users actually take action (buy, sign up, etc.). It’s built to guide them toward one goal and can also include upselling (like showing better plans, add-ons, or bundles).
So basically:
Splash screen = delay
Landing page = conversion
If your goal is more sales or leads, landing pages are the better choice.February 23, 2026 at 11:46 am in reply to: Reasons for low popup submission rate in online stores? #4763ZainParticipantLow popup submission rates in e-commerce stores are typically caused by the following factors:
1. Poor Timing: Displaying a popup the instant a page loads can feel intrusive, while showing it too late may miss the opportunity to convert a visitor before they leave.
2. Lack of Segmentation: Showing the same popup to every visitor, regardless of whether they are new, a repeat customer, or an existing subscriber, results in irrelevant messaging that fails to convert.
3. High Friction and Complexity: Asking for too much information or having too many input fields increases the effort required to subscribe,. Additionally, using a double opt-in process significantly lowers submission rates compared to single opt-in because many users fail to complete the second verification step.
4. Poor Mobile Optimization: Since a majority of traffic is mobile, popups with tiny fonts, hidden close buttons, or forms that do not fit mobile screens create a frustrating user experience.
5. Frequency Fatigue: Showing the same popup repeatedly to the same person without variation leads to annoyance and “fatigue,” making the visitor less likely to engage.
If you’re running WooCommerce and serious about improving AOV without hurting UX, building structured upsell flows will always outperform generic popups.
Analysis of industry data reveals a significant performance gap: while the average pop-up submit rate is approximately 4.65%, top-tier performers (the top 10%) achieve conversion rates as high as 19.77%. Achieving this high-level performance requires a shift from viewing pop-ups as interruptions to treating them as personalized value exchanges.
And this is where WooCommerce Upsell Plugin changes the game.
Furthermore, businesses must balance list growth speed against quality, choosing between single opt-in (1.28% subscription rate) and double opt-in (0.33% subscription rate, but higher engagement) while remaining compliant with Google’s 2025 interstitial standards to avoid SEO penalties.
ZainParticipantMost articles explain what post-purchase upsell pages are, this goes a step further and breaks down the new, often-missed mechanics that actually decide whether they lift AOV or quietly create refunds, tracking gaps, and operational chaos.
New / Under-Discussed Topics Around Post-Purchase Upsell Pages.
1. Behavior-Driven Upsells (Not Product-Driven)
Upsells based on how someone checked out (coupon user, express checkout, repeat buyer) convert better than generic “related products.”2. Post-Purchase as a Micro-Funnel (Not a Single Page)
Top stores run a 2–3 step flow: upsell → downsell → thank-you, instead of one screen and done.3. When You Should NOT Show a Post-Purchase Upsell
High-ticket items, stress purchases, or first-time buyers can see higher refund rates when upsells are forced.4. Fulfillment & Refund Risk (Hidden Cost)
Post-purchase upsells complicate:– Partial refunds
– Inventory sync
– Split shipments
– Most guides ignore this completely.5. GA4 Attribution Blind Spots
Upsell revenue is often overreported because refunds, margins, and multi-event purchases aren’t attributed correctly.6. Design Psychology Shift After Checkout
Post-purchase pages convert better with less hype, fewer visuals, and clearer copy—opposite of checkout pages.7. Contextual Comparison: Order Bump vs Post-Purchase vs Thank-You Page
Each moment has a different user mindset and should sell different things.8. Time-Delayed Post-Purchase Upsells
Some of the highest-converting upsells happen after delivery, not immediately after checkout.9. Margin-First Upsell Strategy (Not AOV-First)
Increasing AOV without tracking fulfillment and refund costs can reduce actual profit.January 16, 2026 at 10:05 am in reply to: How to identify cross sell and upsell opportunities using conversation data. #4668ZainParticipantMost eCommerce brands focus heavily on customer acquisitions. Very few invest the same energy into extracting more value from existing customers, even though the data is already there.
If a customer completes a purchase, GA4 captures the entire purchase journey in real time. That journey holds clear signals for identifying cross sell and upsell opportunities, if you know where to look.
Turn post-purchase insights into scalable upselling and cross selling strategy using GA4, Looker, and WooCommerce funnels.
Why Conversion Data Is More Powerful Than Traffic Data
When an eCommerce conversion happens:– GA4 tracks the full journey automatically
– Every product page, category, and URL visited is logged
– You can see which products or services were explored but not purchased
– These are not random clicks.They represent high-intent interest in specific products and services.
Step 1: Track the Post-Purchase User Journey in GA4
GA4 tracks the purchase lifecycle through events like:– view_item
– add_to_cart
– begin_checkout
– purchaseFocus only on users who completed a purchase and analyze their journey backward.
This reveals:
Products viewed but not bought
Categories explored before checkout
Drop-off points during comparison
These insights form the foundation for cross selling opportunities and upsell opportunities.Step 2: Identify Products Viewed but Not Purchased
A common pattern in GA4:– User buys Product A
– User viewed Product B and C
– User exits after purchaseThese skipped items often fall into two buckets:
Complementary products (natural add-ons)
Higher-tier or premium alternativesThis is where predictive analytics starts, because behavior predicts future intent better than assumptions.
Step 3: Visualize Patterns in Looker Using Converted Users
GA4 shows paths.
Looker shows patterns at scale.In Looker:
– Segment converted users
– Group journeys by purchase history
– Identify frequently viewed additional products alongside the purchased itemWhen hundreds of customers follow similar paths, you’re not guessing anymore.
You’re building a data driven upsell and cross-sell framework.Step 4: Understand the “Why” Without Over-Analyzing
There can be multiple reasons why a user didn’t buy:– Price sensitivity
– Timing issues
– Decision fatigue
– Lack of urgencyInstead of forcing the purchase immediately, the smarter move is:
👉 Change when you offer it.
Post-purchase upselling and cross selling works because:
Trust is already established
Friction is lower
The customer is in a buying mindset
This approach naturally encourages customers to consider more value.Step 5: Turn Unpurchased Products into Cross-Sell Offers
Using GA4 + Looker insights:– Map frequently viewed items as complementary products
– Offer them post-purchase or on the thank-you page
– Add light incentives like discounts or bundlesThis improves customer relationships while increasing average order value.
You’re not pushing.
You’re completing the original intent.Step 6: Convert Comparisons into Upsell Opportunities
Upsells are easiest when:– Customers compared multiple products
– Purchased a lower tier
– Explored premium features earlierGA4 reveals this clearly.
Post-purchase upsells work because:
– The decision isn’t rushed
– The value is already understood
– The upgrade feels optional, not forcedThis is how brands increase revenue without harming experience.
Step 7: Execute the Strategy with an Upsell Funnel Builder Plugin
Insights alone don’t boost revenue. Execution does.An Upsell Funnel Builder Plugin allows merchants to:
– Create post-purchase upsell funnels
– Show relevant additional products
– Trigger offers based on purchase history
– Apply conditional logic and discounts
– Maintain a smooth checkout experience
– This turns analytics into action, without manual work.Why This Strategy Scales Better Than Traditional Promotions
– Uses real customer behavior, not assumptions
– Focuses on existing customers, not just new traffic
– Improves customer relationships alongside revenue
– Aligns analytics with WooCommerce execution
– Reduces dependency on aggressive discountsThis is modern eCommerce growth, quiet, intelligent, and repeatable.
December 15, 2025 at 5:25 am in reply to: Which services offer discounted shipping rates for WooCommerce stores? #4571ZainParticipantIf you’re running a WooCommerce store and looking for services that offer discounted shipping rates, there are several options and plugins designed specifically to help you save on shipping costs while streamlining your fulfillment process.
1. WooCommerce Shipping (Built-in Solution)
WooCommerce Shipping itself offers discounted shipping rates for USPS, UPS, and DHL directly within your WooCommerce dashboard.
You can print shipping labels quickly and access negotiated rates that are typically lower than retail pricing. This built-in feature is great for U.S.-based stores and helps automate label printing and order fulfillment without needing extra coding or volume requirements .2. ShipStation Integration
ShipStation is a popular third-party fulfillment partner that integrates seamlessly with WooCommerce. It offers discounted rates on major carriers like USPS, UPS, FedEx, and DHL. You can automate your shipping workflows, print labels in bulk, and save on shipping costs. It requires no coding and is suitable for stores of all sizes .3. ShipNerd Plugin
ShipNerd provides a WooCommerce shipping plugin that displays accurate discounted shipping rates at checkout by syncing your product weights and dimensions. This helps in showing real-time, competitive shipping rates to customers, potentially increasing conversions. You can manage live rates and get estimated transit times through their integration4. Multi-Carrier Shipping Plugin Like Track Orders for WooCommerce
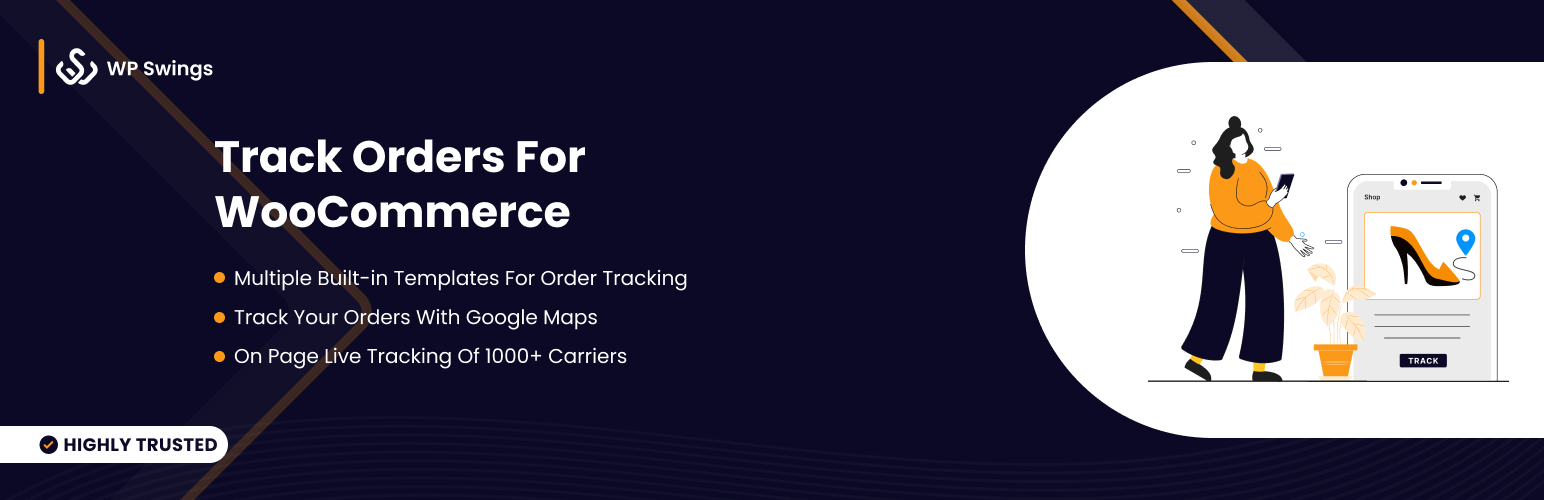
This enables multi-carrier shipping that connect your store to multiple carriers (UPS, FedEx, USPS, DHL, etc.)
These plugins also enable real-time Tracking, label printing, and tracking, making it easy to choose the best carrier for each shipment.ZainParticipantYou can totally integrate QuickBooks with your WordPress site (if it’s running WooCommerce) using a plugin — easiest route by far.
I’d recommend checking out QuickBooks Integration for WooCommerce by WP Swings.
It handles syncing orders, customers, taxes, shipping, and inventory automatically.
Basically, every sale in WooCommerce shows up in QuickBooks without you doing manual entries.
Setups ’ pretty simple:
- Install the plugin → connect your QuickBooks account via OAuth.
- Map your WooCommerce fields (products, payments, taxes, etc).
- Run a test sync — done.
- It’s more reliable than API scripts or generic connectors, and you get full logs + support.
If you just want to understand the process first, this guide explains the basics really well.
ZainParticipantQuickBooks is primarily classified as accounting software. While it can bridge financial information, it offers limited functionality for managing broader business operations.
Core Purpose of QuickBooks
The primary function of QuickBooks is to manage financial matters:
- Its core purpose is to manage accounts payable and receivable, track expenses, and reconcile bank accounts.
- It is well-suited for small to medium-sized businesses that need to streamline their financial functions.
- QuickBooks focuses specifically on accounting and primarily manages financial data.
Comparison to True ERP Systems - ERP systems differ significantly from QuickBooks in scope, functionality, and integration.
Although QuickBooks Enterprise is a more advanced version that aims to expand its features, the sources state that it still falls short of a full ERP system.
Our QuickBooks integration with Woocommerce offers a simple way to sync orders, customers, inventory, and financial data between your woocommerce store and QuickBooks. This is helpful in reducing manual data entry, minimizing errors, ensuring real-time updates of sales and expenses, and helping you to maintain accurate financial records.
ZainParticipantGreat question — upselling can really boost revenue, but it’s also super easy to get wrong.
Here are six mistakes I see all the time (and how to fix them):
1.Not understanding your customer
– Mistake: Throwing the same upsell at everyone.
– Fix: Personalize offers based on what they actually bought. For example, if someone grabs running shoes, offer them socks or a water bottle, not something random.2.Pushing upsells too early
– Mistake: Dropping an upsell before they’ve even finished checkout. That’s just annoying.
– Fix: The best spot is after purchase, when they’re already in buying mode. One-click post-purchase upsells work wonders here.3.Overloading with options
– Mistake: Showing 3–5 upsells at once. It feels overwhelming and most people just skip.
– Fix: Keep it simple with one offer at a time, maybe followed by a downsell if they say no.4.Using bland copy
– Mistake: “Buy more, save more” type lines that don’t excite anyone.
– Fix: Make the upsell page actually engaging. Use visuals, highlight benefits, and tie it back to what they just bought.5.Not tracking results
– Mistake: Setting upsells once and never checking performance.
– Fix: Keep an eye on conversions, test different offers, and see what sticks.6.Forgetting the customer experience
– Mistake: Making upsells feel like a pushy sales trick.
– Fix: Treat it like adding value. Frame it as “this will make your purchase better/easier/more fun” rather than just “give us more money.”#START SELLING MORE TODAY
Upsell Funnel Builder Pro – WooCommerce Upsell plugin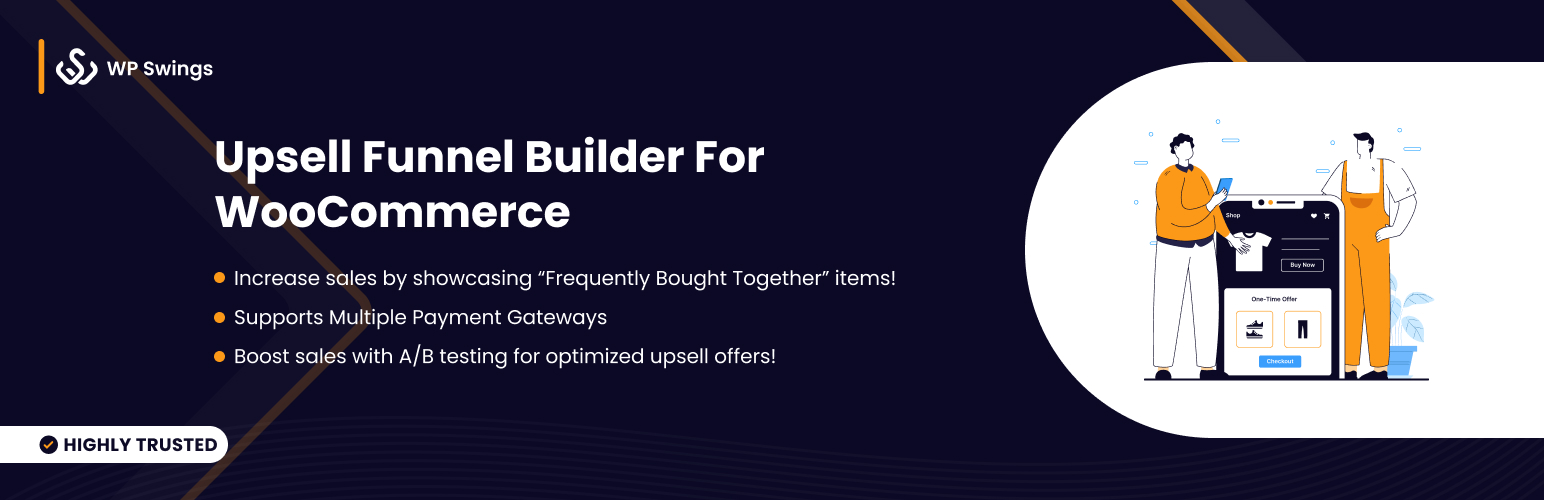
Upsells should feel like a natural extension of the shopping journey, not a roadblock. When done right, they boost AOV (average order value) and improve customer experience.
ZainParticipantYep, you can. The plugin features a Refund Policies tab, where you can build rules using if/else logic. You can set this up by navigating to the RMA Policy Tab ( Return, Refund, and Exchange Logic ), things like:
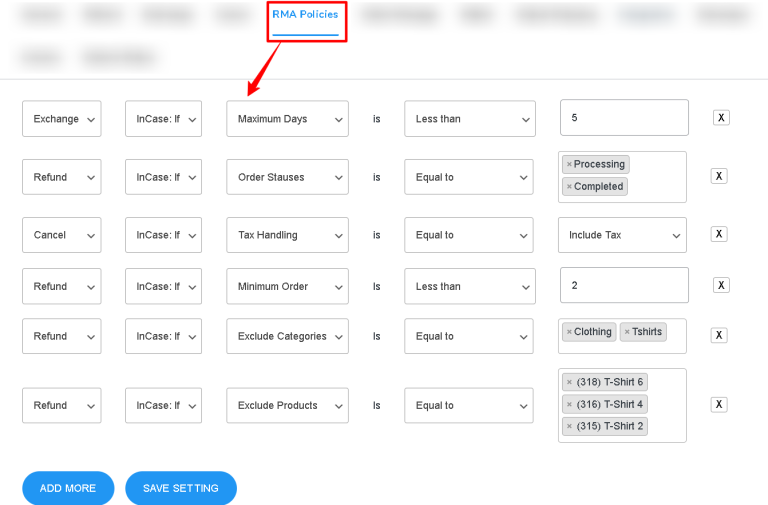
This tab is where the plugin really shines — you can build advanced, conditional rules for RMA processes:
- Maximum Days: Trigger logic based on how many days have passed since the order was placed.
- Order Status (premium): Apply rules based on order statuses such as Completed, Processing, Refund Requested, Refunded, Exchange Approved, Canceled, Pending Payment, or On Hold.
- Tax Handling: Choose whether tax should be included or excluded in the RMA process.
- Minimum Order (premium): Set a minimum order value or quantity required for the RMA to apply.
- Exclude Categories/Products (premium): Restrict RMA requests for certain products or product categories.
August 14, 2025 at 12:28 pm in reply to: How do you make upsell/bump offers more visible at checkout? #4238ZainParticipantI’ve actually tested the blinking arrow on a couple of WooCommerce stores I manage, and honestly… it works way better than I expected.
It’s not like a giant pop-up or flashing banner, just a tiny bit of motion to break the checkout monotony.
Humans are hardwired to notice movement, so the arrow acts like a “psst, look here” without interrupting the flow.
Before adding it, our bump offer was getting decent impressions but meh clicks. After enabling the blinking arrow:
- Click-throughs went up noticeably (no hard sell, just more eyes on it)
- AOV saw a small bump, too
- No complaints from customers about it being distracting
I used a Upsell Funnel Builder plugin that lets you toggle it on in a couple of clicks, so there wasn’t any dev work involved.
( As Per Documentation ) Just Go to:
- WooCommerce → Order Bump → Edit (or create) an offer.
- Find the Design/Appearance Tab
- This section controls how the bump is displayed at checkout.
- Look for “Enable Arrow”
- It’s click on the Checkbox to enable.
If you’re running upsells or bumps in checkout, I’d say it’s one of those “small tweak, big payoff” moves.
July 30, 2025 at 8:48 am in reply to: Can I limit refund/exchange/cancellation requests to specific time slots ? #4192ZainParticipantIf you’re referring to the “Time-Based Policy” feature, here’s how you can usually find and configure it (assuming you’re using the RMA Pro plugin that supports advanced return/refund settings )
Go to your WordPress Dashboard > Navigate to WooCommerce > Return/Refund Settings (or something similar like RMA Settings).
Look for a section titled something like:
- Enable “Time-Based Policy” Or “Time Slots for Request Buttons”
- Toggle it ON to activate time-based restrictions.
- Once enabled, you should see input fields where you can enter the time range (e.g., 09:00 AM – 10:00 AM).
- Save your changes.
What Happens After Setup?
During your defined time slot, the refund/exchange/cancel buttons will be visible to customers.
Outside that window, the buttons are automatically hidden, preventing any new requests.July 16, 2025 at 11:20 am in reply to: How do the Bulk Data Sync, One-Click Sync, and Two-Way Sync features work? #4134ZainParticipantQuickBooks Integration for WooCommerce plugin by WP Swings offers three powerful syncing options to help you manage your store’s data efficiently.
Bulk Data Sync:- This feature allows you to synchronize all your existing data, such as orders, customers, and products, between WooCommerce and QuickBooks in one go.
Benefits: It’s particularly useful when you’re setting up the integration and want to ensure that all your historical data is accurately reflected in QuickBooks.
One-Click Sync:- With One-Click Sync, you can sync your data with just one click, simplifying the process of updating your QuickBooks account with the latest orders, products, or customer information from WooCommerce.
Benefits: It saves time by allowing you to sync data as needed, without doing it manually for every transaction.
Two-Way Sync:- The Two-Way Sync feature enables seamless data flow between WooCommerce and QuickBooks. Changes made in one platform, like updating product details or inventory levels, are automatically reflected in the other.
Benefits: This ensures that both systems are always up-to-date, providing you with accurate and consistent data across your business operations.
June 30, 2025 at 12:29 pm in reply to: QuickBooks Desktop or Online? Which one does WP Swings plugin integrate with? #4105ZainParticipantThe WP Swings plugin specifically integrates with QuickBooks Online, not Desktop.
As per documentation, setup instructions, and QuickBooks WooCommerce marketplace listings confirm it’s built exclusively for the Online version.
Not Compatible with QuickBooks Desktop
There’s no support for QuickBooks Desktop (the locally-installed version). Trying to sync with Desktop typically requires a different tool—like using QuickBooks Web Connector or a third-party sync app—but that’s not what this plugin does.Want a quick walkthrough for QuickBooks Online?
Here’s a short video of the integration setup: -
AuthorPosts